Best Soft and Fluffy Chocolate Chip Cookie Recipe

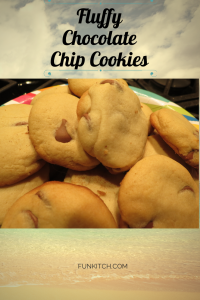
The Best soft and fluffy chocolate chip cookie Recipe!  They are essentially Cake Cookies which from what I hear are all the rage down in southern California.  I started with a basic recipe and kept adding and subtracting things until they fluffed and puffed up to magical goodness.  I hope you try my recipe and comment below how they turned out for you!
cookie, cookies, chocolate chip cookies, chocolate chip cookie recipe, fluffy cookies, soft chocolate chip cookies

This is the best chocolate chip recipe ever – cookies come out soft and fluffy and the chips are amazing

Something smells good – mmm, nothing like the smell of fresh baked cookies, especially fluffy chocolate chip cookies.  I remember when we were selling our first house a realtor and friend told us to stick a batch of cookies in the oven before every open house.  Sounded like a great plan to me, except for the fact that we had a 2 year old and a 4 year old in the house to chase and pick up after.

These days we bake, and we bake, and then we bake some more.  With 2 school aged gals, seems there’s always an occasion to bring cookies to.  And if not we’ll just bake some to have around.  In December I always have a cookie exchange party – it’s become a tradition since we’ve lived here in our 2nd home and we’re going on ten years now!

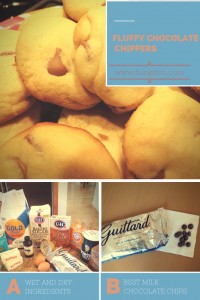
So how do you make the very Best super soft and fluffy chocolate chip cookies?  Start with the best chocolate chips out there of course.  We have tried them all and our all time favorite kind by far is ‘Guittard Milk Chocolate Baking Chips’.  They are amazing.  Our girls would finish the bag easily if we let them!  I stash them away until we’re ready to bake.  What’s so good about them?  Um, …Everything!  Yes, I am in love with these chocolate chips.  First of all they are bigger than your average chocolate chip.   They are smooth and silky and taste as good as Swiss chocolate.  Hands down, I think the best chips out there.  I would love them even if they didn’t come from our very own San Francisco.

Next you need a great recipe.  When I find a good recipe I try it a bunch of times and add my own tweaks.  This recipe is a variation of a recipe I found on Food.com for the Worlds Best Chocolate Chip Cookies.   I like to add cinnamon to my chocolate chip cookie recipes – it gives just a hint of that delish Mexican chocolate flavor.  I’m also a sucker for butter, the more the better – rich and yummy, so slab some more of that stuff in there too.

Ok so enough hinting around, here is the Recipe –

chocolate chips, chocolate, cookies, chocolate chip cookies, baking, soft cookies, fluffy cookies, puffy cookies, tasty cookies, best chocolate chip cookie recipe, recipe, cookie recipe, chocolate cookie recipe

wet and dry ingredients plus quality chocolate chips


INGREDIENTS:

1 c. white sugar (I use a bit more less)

½ c. golden brown sugar, lightly packed

1 cup unsalted sweet cream butter

1 1/4 T. pure vanilla

2 eggs

1 T. of organic apple sauce

¼ c. buttermilk

3 1/2 cups white all-purpose flour

3/4 T. baking Soda

¾ t. salt

¼  t. cinnamon

3 c. milk chocolate chips (essentially the whole bag)

DIRECTIONS:

Preheat oven 350 degrees F

Cream the sugars and butter together, scraping the sides of bowl with rubber spatula

Add the eggs, vanilla and buttermilk and beat with a mixer.

Combine dry ingredients well (make sure the baking soda is mixed in well!)  and integrate them into the creamy butter mixture.

Stir in the yummy chocolate chips

It’s helpful to put the dough in the fridge for a half an hour or so before forming your cookies – just wrap them in some wax paper and stash in the fridge

Spray baking oil on a cookie sheet or rub butter and sprinkle a tiny bit of flour

Roll dough into a ball about an inch and a half in diameter when it’s in a ball and about 2 inches across after you’ve flattened them down a bit

Bake about 10 minutes (be careful not to over bake, set your iPhone timer – I like to check on my cookies at 8 minutes and add a minute as needed because burnt cookies are so sad!

Cool a few minutes on the cookie sheet

Cool entirely on paper towels

chocolate, chocolate chip, baking, sweets, bakery, recipe, recipes, cookies, cookie

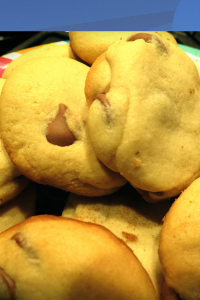
Smell good, taste good, look, are so so good! Softest Chocolate Chip Cookies

Enjoy!


DIY Lazy Susan Turntable Tray

Hello!  In this post I am going to demonstrate how to put together a simple yet elegant, do it yourself lazy susan turntable tray!  You may be wondering, “what do I need a turning plate for?”…so many things! Now that I finally have one I can’t decide where to put it – on the table for condiments? In the living room for drinks or candles? In the family room to house all our remotes? The possibilities are endless 🙂

There are many different ways to make a turning tray, I will show you a clever technique I came up with last week.  I will describe the materials you will need, the steps to put it together, as well as possible usages for your creative lazy susan turntable tray.

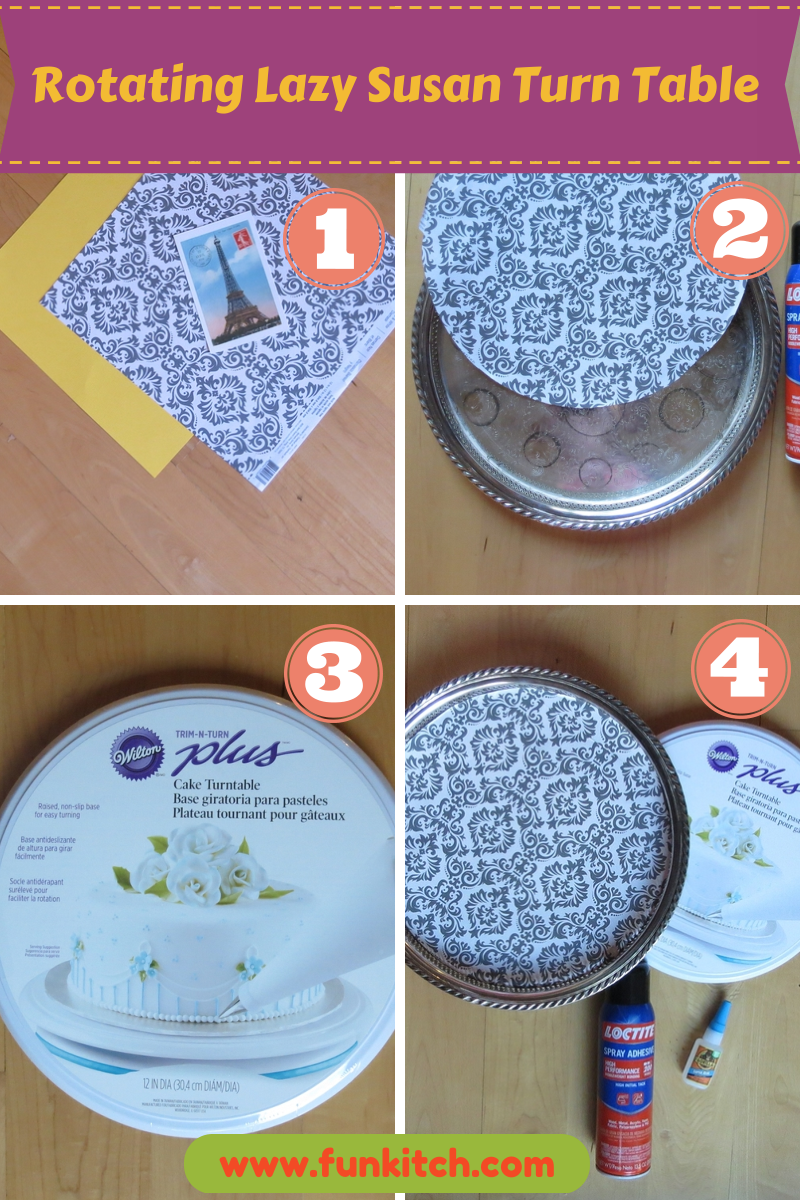
Here is a photo of 4 easy steps to put together a rotating tray:

turning tray, tray, turntable, lazy susan, diy, monogram

Put together this stylish turning serving plate in just a few easy steps.

MATERIALS:

– a tray
– a rotating device – I used a Wilton trim and turn turntable (normally used for icing cakes)
– scrapbook or decorative papers
– spray adhesive glue
– postcards, cut-outs, or other designs
– scissors
– glue stick
– Mod Podge
– applicator sponge and/or brush

STEPS FOR ASSEMBLY:

1. Find your rotating device. Several options will work. I used a Wilton cake decorating plate because I was at Michaels and it was convenient for me to grab. My sister-in-law has a pretty lazy susan on her dining room table which was my inspiration. She made hers with an old TV turntable that they had in the house and weren’t using. Maybe you have an old turning spice rack that you could use for your turning device?

2. A tray or plate. I found a pretty silver tray at the thrift shop for $8! I was happy with the find – it looked elegant and functional, perfect! For my sister in laws turning tray, she used a decorative plate from Cost Plus – simple, smart and pretty.

3. If you are not using a decorative plate for the surface of your turning device, come up with your own design. Scrapbook papers, postcards, wrapping paper, and any other designs you like.  There are many free printables available online, are all possibilities. I will give you the resource/link for the monogram letter I ended up using in to adorn my tray after these steps.

4. Use a spray adhesive to attach the papers and cut outs to the tray.  If you are layering papers you can use a glue stick as well.

5. Cover the top of the paper and designs with Mod Podge or Mod Podge Spray.

6. Allow to dry

That’s it!! Ha! I love this project! I’m going to make more. One for my folks, and maybe one more for the house.

Let me give you a little more detail about where I found materials for MY unique turntable tray described in this blog. I had the Mod Podge and spray adhesive in the house but both can be found and Michael’s arts and crafts. As I mentioned, I picked up a pretty silver tray from a local thrift store. There were many nice trays to choose from there. The scrapbook papers were also from Michaels. I really like monograms – to me they make everything look just a little classier. I decided to look for a simple monogram, an “A” for our family’s last name, ‘Arabian’. There are tons of free monogram printables online. I tried a few and wound up liking one from The Hand Me Down House.
Let’s see, any other tips? Be careful with how much Mod Podge you layer onto the scrapbook paper. Too much will cause puckering and wrinkles. I brushed on the kind that comes in a jar – a lighter look can be achieved using spray adhesive.

VIDEO TUTORIAL:

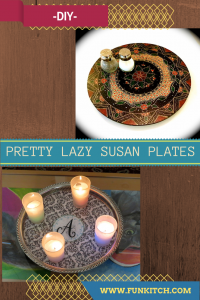
I’ve talked about how I made a turning tray.  I’ve also referenced where I got my inspiration – straight off my sister-in-laws dining table.  Here is a photo showing both:

lazy susan, turning tray, lazy susan plate, rotating plate, plate, dish, serving dish

There are many ways to put together a turning tray or plate. In this blog I give instructions on creatively designing a plate of your own.


I hope I have peaked your interest and inspired you to try to make your own turning tray!! Please let me know if you try it and how it turns out in the comments. I would love to hear about it!

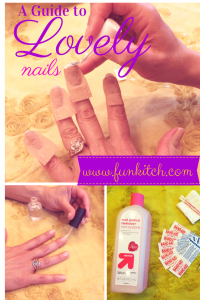
How to do French Manicures with Band-Aids

nails, manicure, french manicure, band-aids, diy, how to

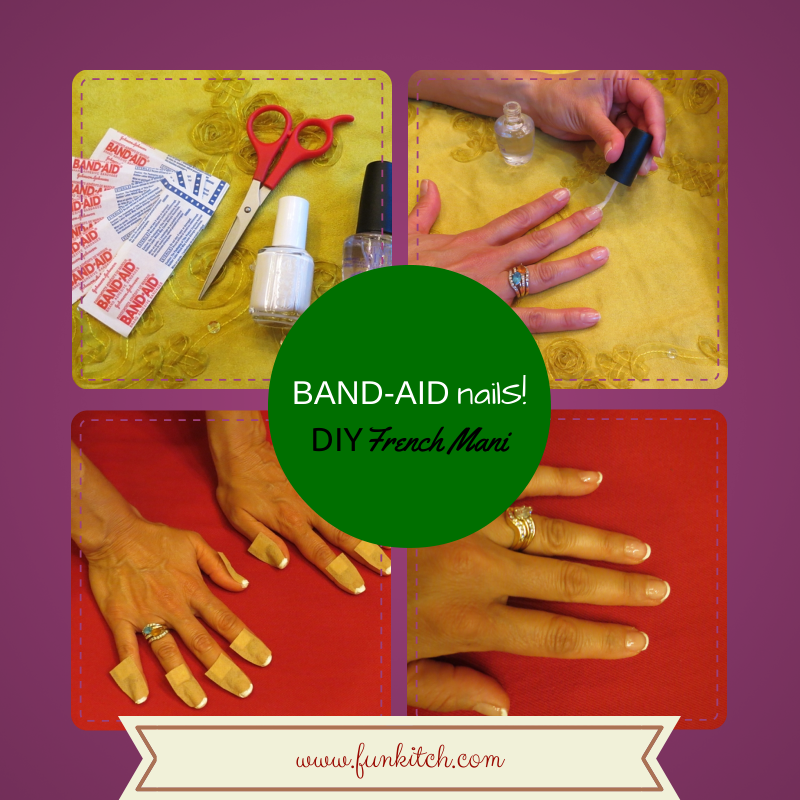
A simple method for how to do a French manicure at home using band-aids.


HELLO!  Taking a break from home projects for a little self pampering. Are you ready to try an easy and inexpensive way to do your own French manicure at home??  I learned how to do this technique from our 11 year old daughter, yup, the kids teach me stuff sometimes too.  I’m pretty sure she saw a photo on Instagram and then figured it out on her own.  She is a kid with good focus and great attention to detail so I must admit, hers came out better than mine did!  She is now on to shades of blue but I will grab a pic of her cute little Frenchy nails next time she does it.  Best part is that little smarty pants has great tips.  In this post I will share with you Materials you will need, basic Step by Step Instructions on how to use this clever BAND-AID technique, and our little gal, Ava’s super tried and true Tips for Successful BAND-AID and polish application.
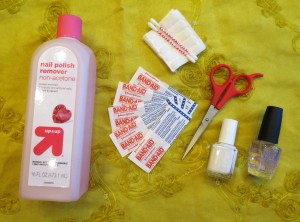
Here is a list of all the MATERIALS you will need:
– white nail polish (we used essie 10 blanc)
– clear polish (try O*P*I Start to Finish, base coat, top coat and strengthener all in one, plus it is quick dry!)
– nail polish remover (ours is Target brand) – BAND-AIDs…of course!
– sharp scissors
– cotton balls or swabs
– Q-tips IMG_3991

STEP BY STEP INSTRUCTIONS just for you:

1. Paint a clear coat of polish well ahead of time, day before or a couple hours before/ or skip base coat of clear polish all together if you are short on time…it will stick to the BAND-AIDs and get all messed up 😉

2. Grab 5 medium sized BAND-AIDs.  Take the paper off the BAND-AIDs and cut them all directly in half

3. Peel the back paper off a BAND-AID half and position it towards the top of your nail with a little moon shaped space left at the top – like a frown shape.  Do this with all 10 of your nails.  For me this was the trickiest part, getting all the band-aids in the right spot.

4. Now you are ready to paint on the white nail polish to the tips of your nails that are still exposed and not covered by the BAND-AIDs.  It’s fine if you get a little white polish on the BAND-AIDs since you will be peeling them off at the end.  Let the first coat dry about 5 to 10 minutes.  Apply a 2nd coat of white nail polish to the top of your nails.  Let dry for another 5 to 10 minutes.  If you have someone around to help, have them do your prominant hand – for me that’s my right hand it and it’s always tricky to do myself.
5.  When you think the white tips are completely dry, carefully peel of the BAND-AIDs
6.  Use nail polish remover and Q-tips to clean up skin around your nail.
7.  Apply a clear top coat to all your nails.  Let dry. That’s It!

manicure, French manicure, BAND-AID, how to, DIY, do it yourself, nails, nail art

AVA’S TRIED AND TRUE TIPS:
– Stick the band-aid halfs on your skin a couple times to lessen the stickiness.  This will help when it is time to carefully remove the band-aids at the end.
– Work on a paper towel or placemat in case of spills
– Wait and wait in between layers of polish, watch a show or two
– Don’t apply more than two coats of the white polish on the tips, it will get chunky and messy
– Have plenty of Q-tips and cotton balls nearby for clean up at the end
– Pour nail polish remover in the cap of the remover bottle to easily dip Q-tips in to clean up your fingers at the end Let us know if you try this technique and how it goes for you!  Were you inspired to try it??  Leave your feedback in the comments, love to hear from you!

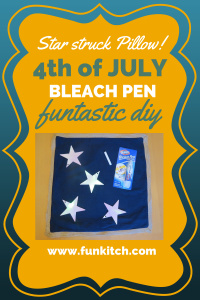
STAR STRUCK! Super Cool 4th of July DIY Bleach Pen Pillow!

bleach pen 4th of July Stars and Stripes DIY project

Super Sassy, Star Struck 4th of July Bleach Pen Pillow!

Hooray! Try this super fun, super easy DIY bleach pen pillow! I LOVE BLEACH PEN PROJECTS!! Did I tell you it was easy? I literally designed and made this super cute pillow from beginning to end in maybe a half an hour. With hungry kids and hubby I have to be lickety split quick!

In this blog I will give you step by step instructions on how to make this darling pillow. You will need the following materials:

– a pillow covering in a dark color (higher concentrations of cotton work best), with a side zipper or opening
– a CLOROX bleach pen (I get mine from Target and I buy them 3 or 4 at a time!) they are a few bucks
– a piece of white chalk to sketch out your design before bleaching
– a shape or stencil for your design (I used stars)
– a timer
– a sink for rinsing off the bleach
– a washer and dryer
– a pillow cushion for inside
THATS IT!

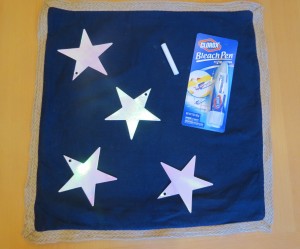
Here is a photo of the materials I used:

easy fourth of July 4th of July DIY bleach pen stars pillow

Easy Materials for diy Bleach Pen Star Pillow

Lucky for me I had some star shapes laying around the cupboard left over from our little gals last birthday party. She had a sweet ‘fashion show’ themed party and we decorated the house movie star style. I had hung a bunch of stars from the ceiling near the ‘runway’. Perfect! I used these stars as my tracing template – glad I saved them! See there are some benefits to being a pack rat 🙂

Here are the steps for making this darling 4th of July, star pillow simply with a piece of chalk, some cardboard star shapes, and a bleach pen:

1- take the pillow cushion out of the pillow covering (I found my dark blue pillow with the stylish burlap trim from Pier One yesterday. It was $29 but on sale, gotta love that! I was searching for a good sized pillow with a side zip to remove the cushion for this project)
2- IMPORTANT! Put something inside the pillow to protect the back side from the bleach. I used a sturdy placemat this time. I have used cardboard in the past. Just be sure whatever you use covers the area you are working on.
3- place your shapes or stencils on the pillow covering
4- use a piece of white chalk to trace and outline the shapes or stencils
5- remove the shapes or stencils
6- go over your chalk tracings with the bleach pen (I prefer to work quickly to make smoother lines). I’m not going for perfect here! I love the artsy, Batik look of the finished project – definitely not perfect but very pretty!
7- set your timer for 5 minutes. Wait 5 minutes 🙂
8- gently take it over to a sink to rinse off the bleach – I recommend wearing gloves here. The bleach can be harsh on your pretty little lady hands, lol
9- run through laundry machine and dryer – this sets the bleach and keeps your design

10-stuff the pillow cushion back into your newly designed star spangled pillow, yay!

Here is a snazzy video on how to do all that!

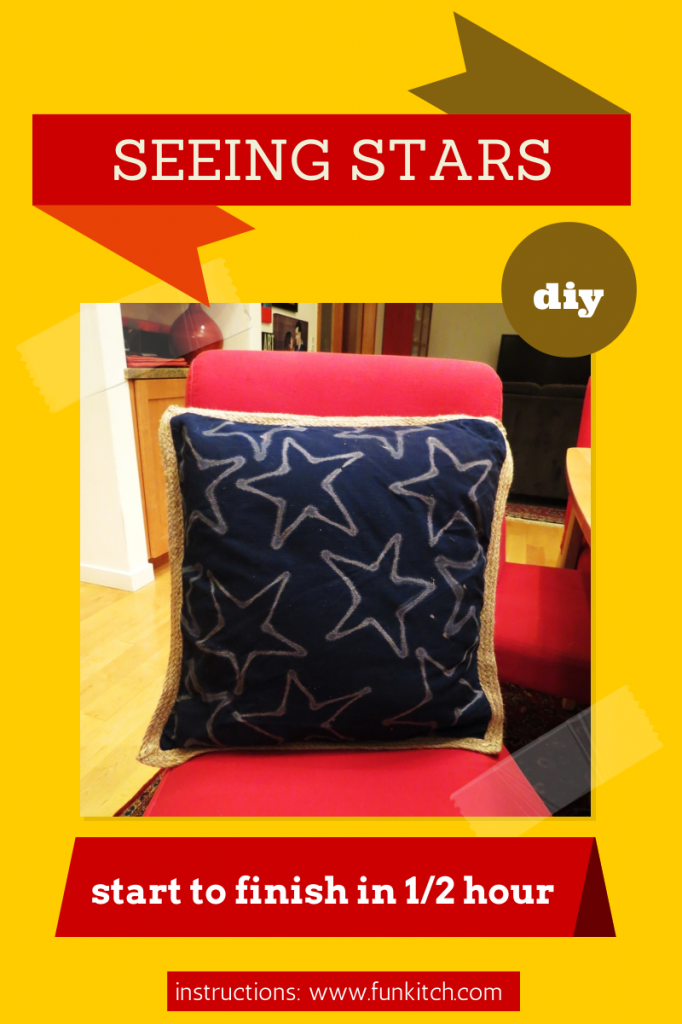
So cute, so easy, so fast! Start to finish is about a half and hour, honest. This is what my pillow looks like all finished:

bleach, star, stars, 4th of july, blue, bleach, bleach pen, diy, do it yourself, how to, pillow, pillows, fabric, fabric art, batik, decor, decorating, design, designing, art

Here is the end product of a quick and easy bleach pen pillow project, perfect for decorating for the 4th of July!

…think I’m going to make a 2nd pillow and put them both out on our red patio furniture out back – it’s gonna look great! YAY!!!

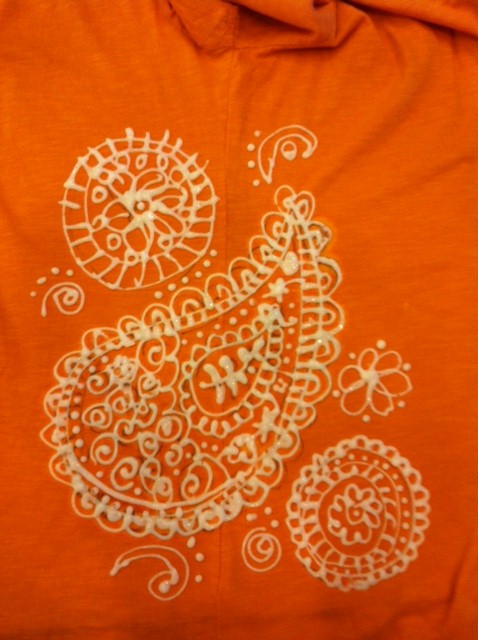
Where did I get inspired to try this?  I made a handful of bleach pen t-shirts awhile back.

paisley bleach t-shirt style fashion

paisly t-shirt bleach pen art fashion design

I would show you the finished product (what the t-shirt looked like after the bleach was washed off and it was dry) but I gave it away as a gift! I gave it to friend of mine who loves orange and loves paisleys and now I believe loves this t-shirt!  For detailed instructions on how to make a cool and artsy shirt using bleach pens, go to my post Design T-shirt with CLOROX Bleach Pens for Art and Fun.

Let me know if you tried to make a pillow like the one above or have tried something similar. Did I inspire you? I’d love to hear from you! Leave me a comment. thanks for stopping by!

Chalk It Up BlackBoard Fun!

http://www.funkitch.com/make-chalkboard-door/

funkitch.com crafts art fun kitch

ME!

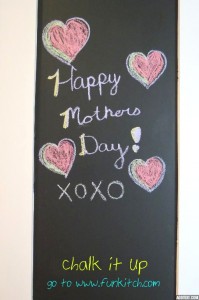
Hello!  Happy Mother’s Day to me!  And you!…if you’re a mom, and if not you come from a mom so happy Mother’s Day anyhow. ChalkBoard Pantry wall project was a success, yay!  Here it is dolled up by my gals this morning – Love It!

ChalkBoard Paint Wall, ChalkBoard Paint Wall, BlackBoard paint, Chalk, DIY

ChalkBoard Paint Pantry Door

See yesterdays post for step by step instructions on this fun DIY BlackBoard project.  Can’t wait to use this massive space for writing everything and anything. Hmmm, maybe not the ‘to do’s’ and grocery lists – I have enough of those! But I can’t get enough of our girls art. Gotta keep those creative bursts flowing. Here is the How To -DIY video in case you missed it on yesterdays post:   Hope you are inspired by this fun and easy ChalkBoard Paint door – if I can do it so can you! Just be sure you have lots of paper towels around. Little gal loved helping and we had lots of globs on the floor, on the door, on our selves – black paint can be stressful! Good news is that it wipes right off when you catch it quickly. Have fun and go for it! Chalk it up friends 🙂