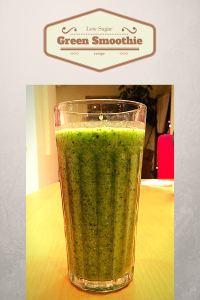
Low Sugar Green Smoothie

When you are in the mood for a green smoothie and don’t want to have too much sugar to disguise the vegetable taste (lots of recipes out there pour in sweetened apple juice or other sugary juices for sweetness), try this great recipe for a Low Sugar Green Smoothie!  I like to use spinach because I have to admit, I’m not a huge fan of spinach in my salads.  Somehow, I can drink my spinach just fine.  This green smoothie is fresh and light and instantly makes me feel better.

green smoothie, smoothie, spinach, healthy, low sugar, blender drink, blender, drink

Low Sugar Green Smoothie

Here are the ingredients:

3 handfuls – organic baby spinach

about 15 – green grapes (I keep grapes in the freezer for smoothie use)

1 1/2 cups Toasted Coconut Almond Milk Blend (made by Califia Farms)

2 peeled and sliced kiwi fruit

1 t. ground hemp (optional)

1/4 cup pure pressed, no sugar added organic apple juice

1 scoop (about 20 mg.) Stevia extract

A splash of fresh lemon or lime juice

This recipe makes slightly more than 1 large, 8 oz. glass of smoothie, so it’s enough for about one and a half people 😉

Add all ingredients to a high powered blender.

We recently replaced our blender of 17 plus years, a wedding gift, that finally broke down.  I researched blenders and found one I felt was reasonably priced and that could do everything I was looking for.  A couple weeks ago I picked up a Ninja Professional 1000 watt blender.  I’ve been very happy with it so far.

In any case, put all the ingredients in whichever high powered blender you may have.  With my Ninja blender I turned the power on level 2 and my Low Sugar Green Smoothie was blended smooth and ready to pour and drink in under 2 minutes.  I know there are higher end and stronger powered blenders out there.  If you have one you may try adding fresh slices of apple vs. the apple juice.  That hat would be even healthier since you’ll keep the good fiber and whole fruit is better than juice when you have that option.

I did not add any ice to my smoothie.  We came home from a mini beach holiday to a very, very cold house and an iced drink was not at all appealing to me.  This light and fresh low sugar green smoothie with no ice sure did hit the spot however.  So many vitamins and nutrients!  I drank it down and it tasted really good, honest.

One last thing – if you are looking for a protein boost, add about a tablespoon of Spirulina to your green smoothie.  I’m fresh out but plan to pick some up and add it to my next one.  Hubby came home and is interested, to my surprise in trying the Low Sugar Green Smoothie.  I’m pretty confident he will like it – and so will you!  It’s so great to have a tasty treat that is so healthy and good for you too.  Enjoy!
 

DIY Emoji Ornaments

DIY Emoji Ornaments

DIY Emoji Ornaments

I’d like to introduce a talented crafter and old friend of mine as a guest blogger on Funkitch.  Her name is Jen Grech.  We met when our first kids were small babies and have stayed connected through Facebook and through a mutual friend.  Only recently have we discovered that we share a passion for creating and crafting.  Jen has two sweet boys and an adorabe pup.  Here is a pic of  beautiful Jen and a pic of her kids –

beautiful and talented Jen!

beautiful and talented Jen!

Jen's Kids

Jen’s Kids

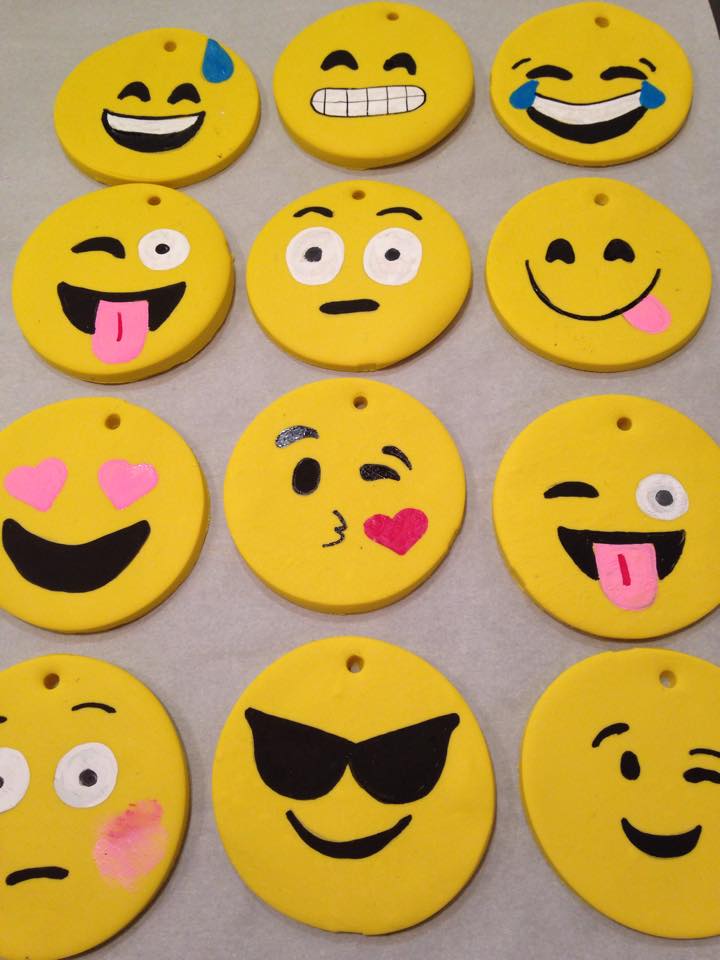
A couple weeks ago I fell in love with a craft that Jen shared on Facebook – Emoji Ornaments. She made them for a friend of hers that loves, loves using emojis. My girls are very into the whole emoji world these days and I immediately asked Jen for instructions on how to make them. She shared with me that she used instructions from a blog but made adjustments.  I really liked the way Jen’s came out and since she used entirely different materials than the original blog where she got the idea, I asked her to write out instructions and do a guest blog post for me.

It is 3 days before Christmas and this amazing woman sent me step by step pics and detailed instructions on how to make adorable emoji ornaments with Jen’s special tips and touches.  Thank you Jen!

Without any further delay, here are the instructions.

Supplies
Circular Cookie Cutter (mine was 3 inches around) or top of a glass/plastic cup
1 Lb block of yellow Craft Smart Polmer Clay – 1 block yeld about 13 emoji ornaments
Craft Smart Paint Pens in White, Black, Light Blue, Red and Pink ( I used a medium tip)
Egg beater ( I used the top to punch a hole in the ornament) or end of shish kabab stick
1. Pre-heat oven to 275 Degree
2. Line a baking sheet with parchment paper
3 Divide clay block in half and soften with your hands a bit before rolling out into about 1/4 inch thickness
4. With your cookie cutter press out a circle and with the top of a egg beater punch a whole so you can hand the ornament
5. Place the circles on the lined cooked sheet and bake according to instructions (about 20 minutes)
6. Once they are cooled, sketch the faces I in pencil.  Go back over with the paint markers. You may need to go over a few of the colors more than once.
7. Cut a piece of twine (I used bakers string), feed through top hole and tie the ends together.
That’s it!  Jen, you are a brilliant crafter – thank you!
Here are some pic’s Jen kindly sent over to me with hopes that they will be helpful in putting these together.
emoji on present
These darling little DIY Emoji Ornaments make great tree ornaments, gift toppers, and teacher’s gifts.  We all have that friend that loves to use emojis (myself included!) – fun little gift idea.  Teenagers love them too.
Hope you have fun  making your own DIY Emoji Ornaments!


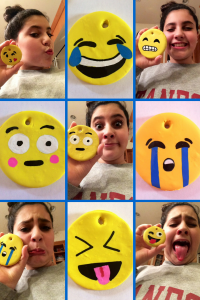
Our girls had a ball making all kinds of emoji faces!  Silly, silly!

emoji, emojis, craft, ornament, clay, paint pens

DIY Lazy Susan Serving Plate

DIY Lazy Susan Serving Plate

Several months ago I made a rotating lazy susan turning tray based on a beautiful handpainted DIY Lazy Susan Serving Plate my sister-in-law, Stacy put together.  She used an ornately decorated plate she found at World Market and glued it to a Rotating Turntable Lazy Susan.   I have been on a quest to make something similar to that ever since.

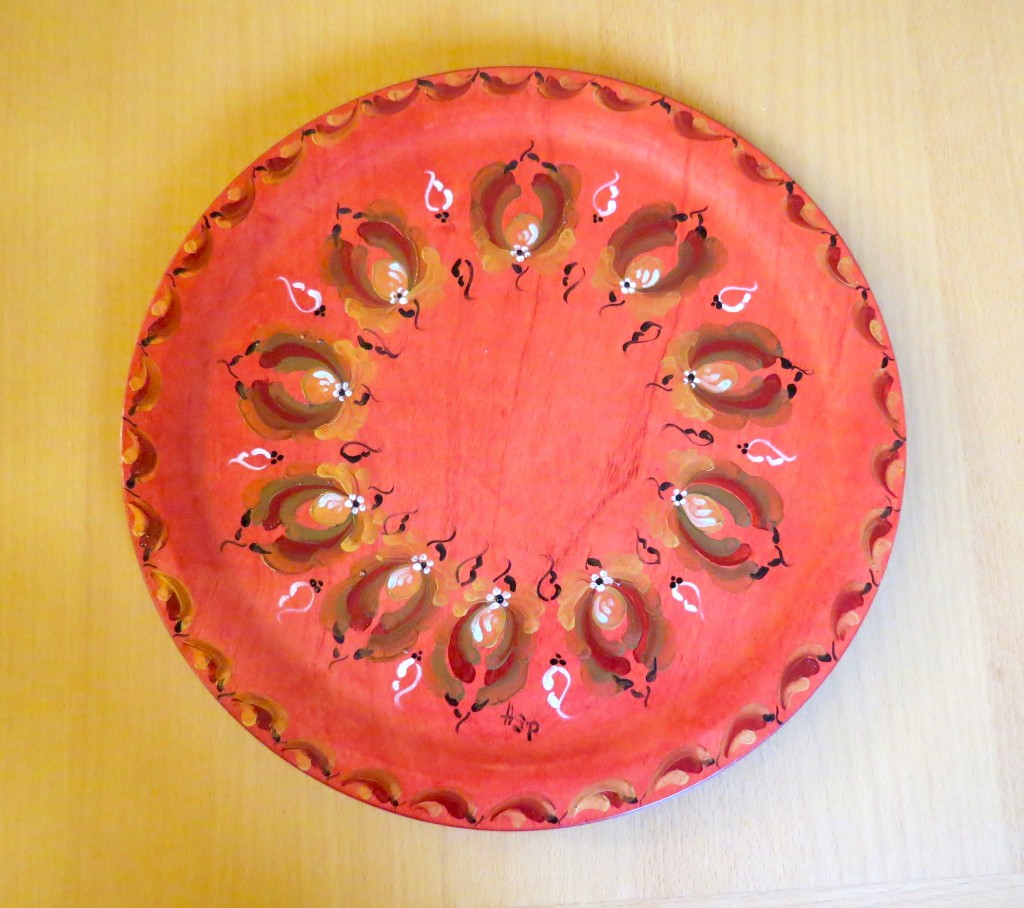
Earlier this week I found myself at an annual holiday craft fair I like to help my mom with.  My mother is a master with fiber arts and makes beautiful things.  Part of the fun of helping with this fair is walking around and seeing all the handi-crafts and tasty treats at each table.  I found a nice older woman who had all sorts of hand-painted wooden things – trays, plates, little tables and small dressers.  I loved her designs, in particular a red stained large wooden plate with hand-painted flowers and leaves.  I instantly thought of my mother-in-law when I saw this plate and her amazing Thanksgiving decorations.  I decided to buy that plate from the nice old lady and make a lazy susan serving plate to gift to my mom-in-law for her Thanksgiving table.

Here is a pictures of the plate I found at the craft fair:

plate, wooden, hand painted, serving plate

Hand-painted and stained serving sized plate

On my way home from the fair I stopped by at our local Ace Hardware store.  I called first to find out whether they had a lazy susan mechanism I could use to glue under this pretty plate to make it turn.  They told me they had a few sizes so I decided to go by and see the options.   I ended up going with the smaller sized lazy susan device (meant to be screwed into corner cabinets).  It had 4 flat sides on the corners so I figured there would be enough space to glue it down to the plate.  I spent around 5 dollars on the small turn table mechanism.


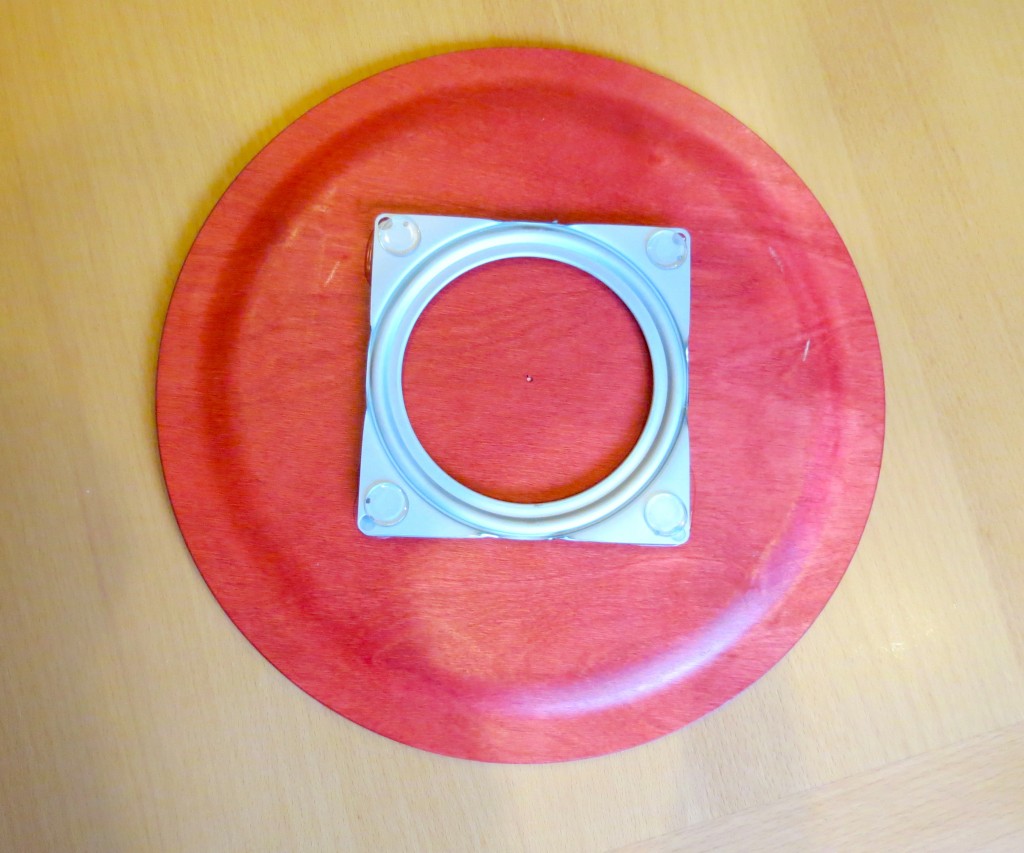
Here is what the turning device (lazy susan) looked like when I glued it to the back of the plate:

lazy susan, plate, hand painted, glue

Lazy susan device glued to the back of hand painted plate.

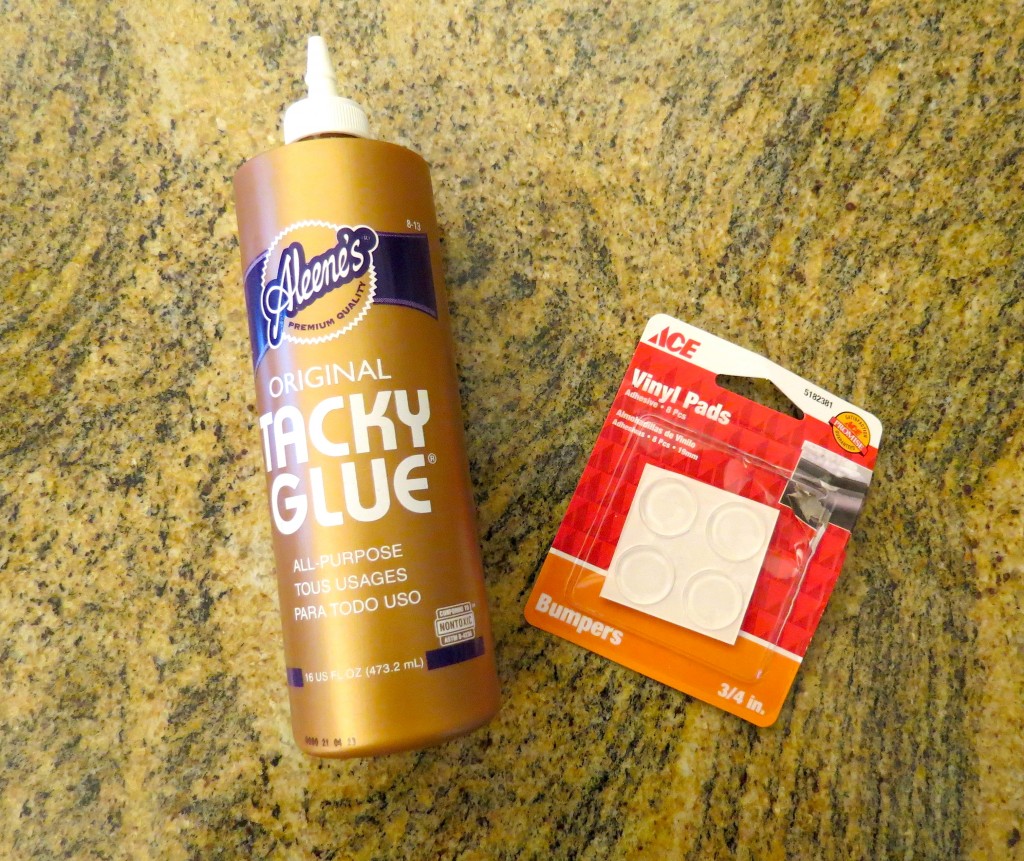
I thought about using my handy glue gun to get the lazy susan attached to the plate but went with Tacky glue to get a flatter drying glue effect.  Glue gun glue sometimes clumps up on me unevenly.  The Tacky glue worked well.  If you go with Tacky glue remember it takes time to dry.  I let mine dry over night plus a few more hours in the morning.

I also picked up small Adhesive Vinyl Pads from Ace hardware to stick on each of the 4 corners of the lazy susan mechanism.  If you look closely at the photo above you will see the small round, rubbery pads.  I put these on to keep the plate in place when it is being turned.

So basically, aside from the serving plate, I only needed three things to put this lazy susan serving plate together;  the lazy susan mechanism, the Tacky glue and the adhesive vinyl pads.

Here is a photo of the glue and the pads:

tacky glue, glue, pads, adhesive pads

That’s it.  I will put in a video of the pretty plate rotating.  It turned out so nice and I can’t wait to give it to my mom in law and see it on the table for Thanksgiving!

Microwave Persian Cookie in a Cup! No Egg Required

Microwave Persian Cookie in a Cup!  No Egg required

In our house, fairly often, someone is having a sweet tooth. We try not to keep goodies in the house except for special occasions. Sometimes when the cravings are strong we get creative. What’s great about making a very small portion of cookies, just enough to fit in a mug, is that there is no temptation to have more than one.

It all started with microwave brownies in a cup. Next the craze was for the infamous chocolate chip cookie in a cup. For a bit we made microwave snicker-doodles (mainly when there were no chocolate chips in the house). That’s when I had my idea to create a unique recipe for Persian cookies in a cup!

We are Iranian by family. The kids were born in America but hubby and I had some infant and early childhood years in Iran. I was personally a baby when we came and I hate to admit that there is not much Iranian-ness about me. Raised in the mid-West and surrounded by my friends, I quickly acclimated to the culture here in the U.S. Even so the family heritage is strong and I have a special place in my heart for those interesting spices found in Iranian desserts.

Without any further ado, here is my rendition of the microwave cookie in the cup. My version is a combination of all my favorite Iranian desserts in one! There is cardamom from chickpea cookies (‘nokhod-chee’), rice flour and rose water from rice flour cookies (‘noon-eh berenji’), cinnamon and honey from baklava. Basically I used a blondie type cookie base and added the spices from these exotic goodies.

Here is my RECIPE for Microwave Persian Cookie in a Cup! No Eggs Required

2 T. butter

3 T. brown sugar

¼ t. vanilla

microwave 30 seconds and stir

2 T rice flour

1 T. white flour

2T. milk

big pinch cardamom

small pinch cinnamon

¼ t. Rose water

– Stir

– Microwave 30 seconds, stir and pat down flat

– Microwave 30 seconds one last time

– Allow to cool

For a visual description of how to make these little treats, watch this video:

That’s it! Treat yourself to this tasty, exotic treat for one – Microwave Persian Cookie in a Cup! No Egg required


Hand Weaved Doggy Collars and Friendship Bracelets!

Hand Weaved Doggy Collars and Friendship Bracelets!

hand weaving, friendship bracelets, bracelets, jewelry, friends

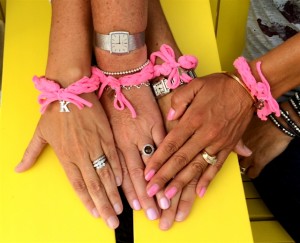
Hand weaved friendship bracelets made from upcycled t-shirt yarn

Today I’m going to show you how to make Hand Weaved Doggy Collars and Friendship Bracelets out of upcycled t-shirt ‘yarn’.

I’m super excited to head back to my home town, East Lansing, Michigan and then up to Torch Lake in Michigan to hang out with 3 of my close high school pals – one now lives in Nevada, one lives in Georgia, and one still in good ole’ Michigan. What I love is that we can be so goofy and carefree when we’re together. We have fun reminding each other of stories from when we were crazy teenagers. Hard to believe now we all have our own kids that age. We first started reconnecting at our high school reunions. A few years ago we decided the big re-unions every 5 years were not soon enough to get together. Now we do our best to have our ‘girls retreats’ with all 4 of us once a year. Last year we met up in San Diego. This year we’ll all get back to our home turf.

 Now let’s get to how to make these cute, stylish, chunky braided bracelets!

Here’s a list of what you’ll need:

Old t-shirt

Sharp fabric scissors

Reading glasses? (ha! Not quite yet!…am I in denial??)

Your hand!

First cut off the bottom seamed edge of the shirt. Next cut one inch strips across the bottom of the t-shirt. Cut your fabric strip in half. Do that again. Connect the two pieces.  Here is a very detailed instructional Video on how to connect two pieces of fabric yarn – you should be able to get the hang of it after watching the first two minutes of the video.

Now is where the fun begins!

Put your right hand out Michigan style with your palm up and your thumb facing the right. Take your fabric yarn and grab the end. Pull the end up from behind your hand and then between your pointer and your thumb.

bracelet, friendship bracelet, braided, weaving

Hand weaving Friendshiop bracelets

Weave the yarn through your fingers. It’s much easier to have a visual for the first steps of hand weaving.

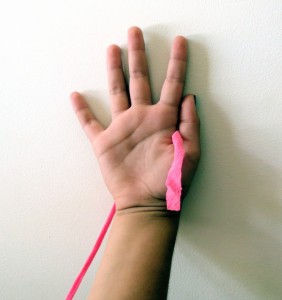
Here is a picture of our younger daughter demonstrating:

hand crochet, braiding, finger crochet, friendship bracelet, friendship bracelets, dog collar, collar,

How to wrap fabric yarn around fingers for weaving

In the above photo Ava let go of the tail end that she was holding with her thumb and it is hanging between her middle finger and her pointer – it worked out fine.

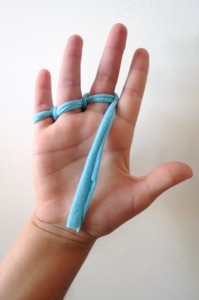
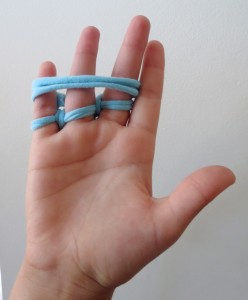
Next you take  your longer piece of fabric and wrap it around all three fingers – around your pinky, ring finger, and middle finger.  It is best described visually.  Here is Ava demonstrating what it looks like after it is wrapped around:

fabric yarn, hand weaving, hand crochet, friendship bracelets, dog collar

Fabric yarn wrapped for hand weaving

This is where the fun finger weaving begins!  Starting with your pinky finger, bend your pinky down holding on to the top piece of fabric yarn and take it under the lower piece wrapped around your finger.  Do the same thing with your ring finger and your middle finger.  Repeat rows.

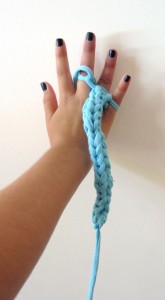
After you have done about 4 or 5 rows this way, pull the tail end from the back so it looks like this:

hand weaving, hand crochet, friendship bracelets, dog collars

pull the end of the weaving – looks like this when it is close to finished

The whole process from start to finish is best described by watching my YouTube video here:

So now you’ve hopefully been able to follow my YouTube tutorial on how to make chunky braided friendship bracelets.

Hope you enjoyed that – I pasted in a pic of my high school gal pals and I all sporting our friendship bracelets at the very end of the video tutorial.  Now I am back home in Cali just missing the good times we had together.  You can see Torch Lake in the background and the cute Michigan shaped teak chairs Debbie has in her cottage yard.  We had a super fun dinner and laughed to tears that night out!  Miss them all and can’t wait for our next girls trip!!

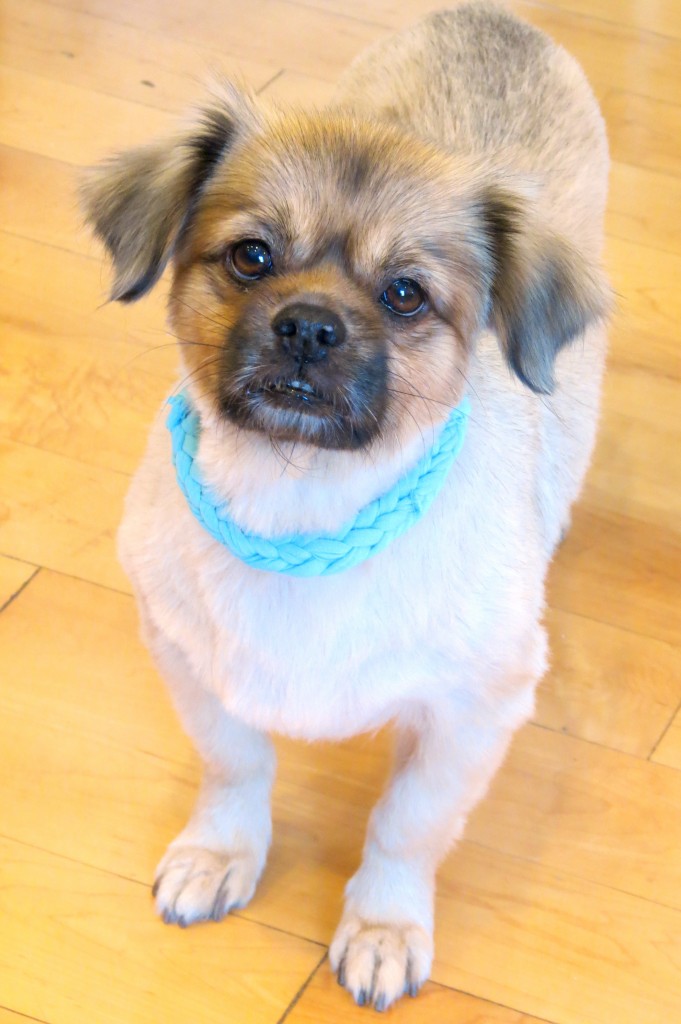
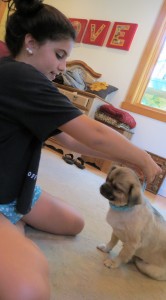
Well when I got home from my girls trip to Michigan, our younger daughter Ava and I took our dog Oscar to the groomers for a haircut.  He looked so cute when we brought him home that we just had to make him a braided collar.  It was Ava’s idea.  Here are a couple cute shots of her putting the collar on Oscar and how sweet he looked afterwards.


dog, doggy, pup, puppy, collar, dog accessories, friendship bracelets, braided collar

Our dog Oscar modelling his new hand weaved pup collar

dog, dog collar, puppy, pup, braided collar, hand-made, diy

Fun dressing up our cutie pie pup hand weaved doggy collar

Thanks for reading this post and I sure hope you try making your own hand weaved doggy collars and friendship bracelets soon! If you do please let me know how it went – I would love to hear. Subscribe to this blog for more inspiring ideas and tutorials of how to make well, nifty stuff 🙂 xx o -Bita


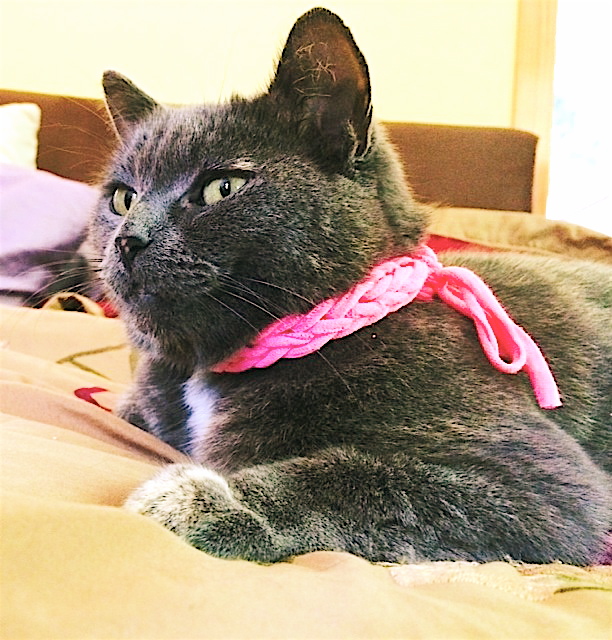
Oops!  Don’t forget kitty – Bluebell seems to like sporting her new kitty collar.

cat, kitty, cat collar, collar, leash, weaved, braid, braided, braiding

Our kitty Bluebell sporting hew new friendship collar, hand weaved by Ava

Isn’t she lovely? Isn’t she wonderful?
Isn’t she precious?